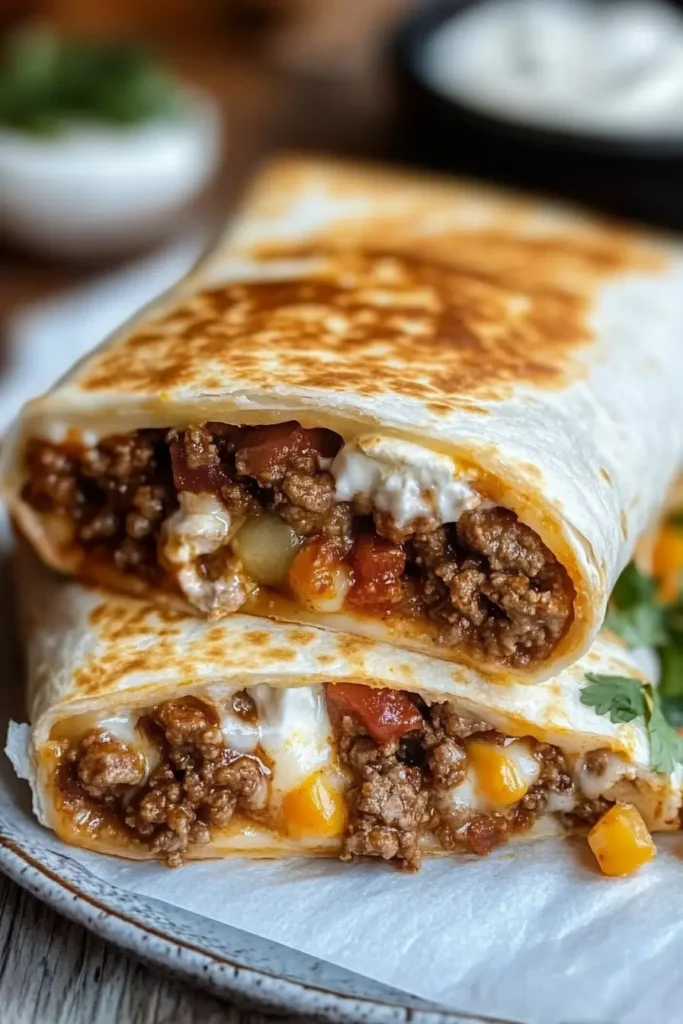
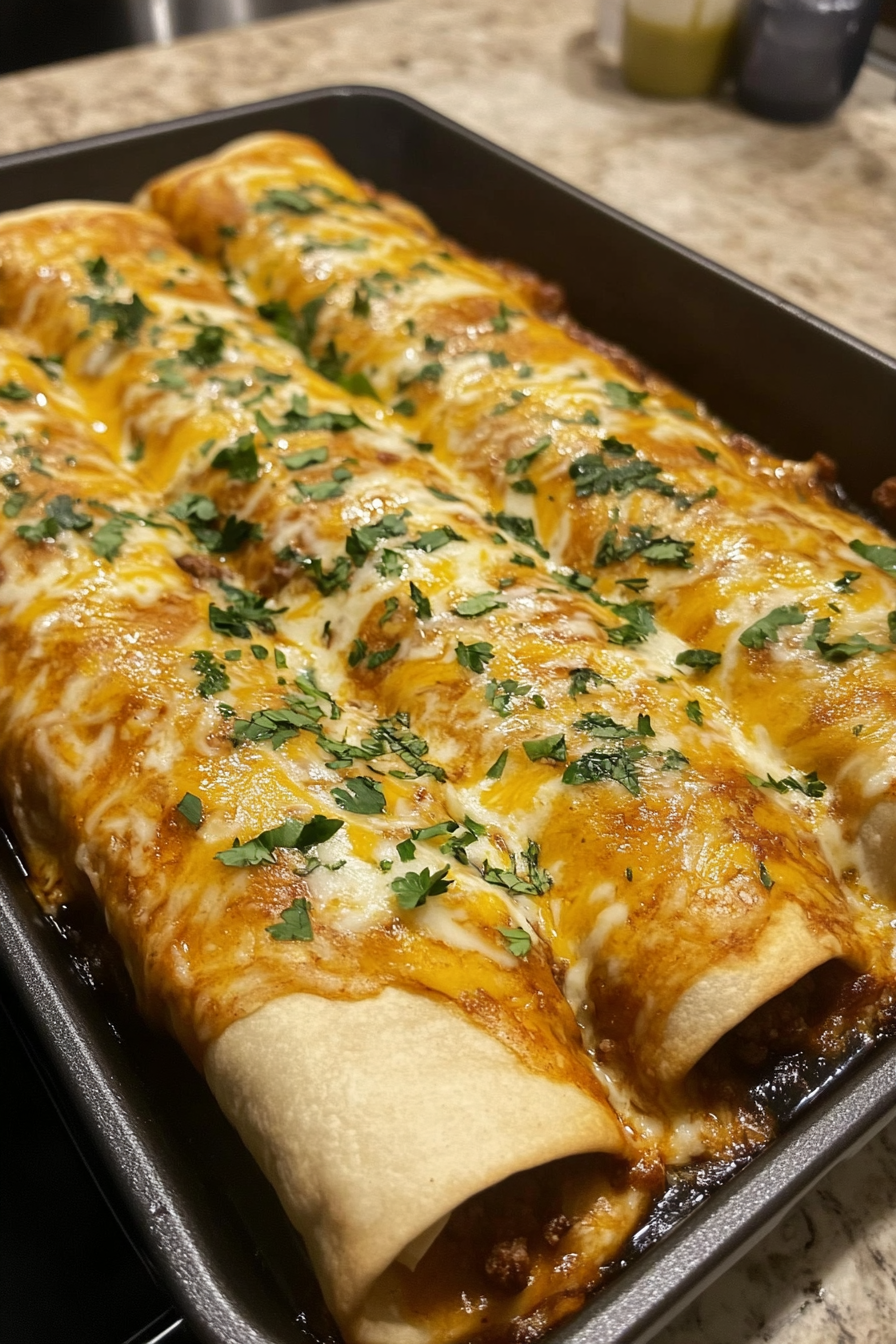
Are you craving something hearty, cheesy, and absolutely irresistible? Look no further than these Crispy Beef and Cheese Chimichangas loaded with seasoned meat, melted cheese, and fresh toppings. There’s something magical about biting into a perfectly crispy chimichanga that gives way to juicy seasoned beef and gooey melted cheese. This Mexican-inspired favorite has become a staple in my kitchen, and I’m thrilled to share it with you today!
Subscribe to receive this mouthwatering Beef and Cheese Chimichangas recipe directly in your inbox, along with other delicious meal ideas that will transform your dinner routine!
Why You’ll Love These Beef and Cheese Chimichangas
These beef and cheese chimichangas are the perfect solution when you need a filling, flavorful meal that’s sure to please everyone at the table. Unlike traditional deep-fried versions, these are baked to crispy perfection, making them somewhat healthier without sacrificing that satisfying crunch we all crave.
What makes these chimichangas truly special is the combination of perfectly seasoned ground beef, aromatic onions and garlic, and two types of melty cheese all wrapped in a golden, crispy tortilla. The smell when these are baking in the oven is absolutely incredible!! I’m kicking myself for not having photographed the moment my family’s faces lit up when I served these for the first time.
The beauty of this recipe lies in its versatility. You can customize the fillings based on what you have on hand, and they’re perfect for meal prep too. I promised you versatile, and here’s proof! These chimichangas are anything but boring!!
What Do Beef and Cheese Chimichangas Taste Like?
Imagine taking a bite through a crispy, golden-brown tortilla shell that gives way to a savory, well-seasoned beef filling that’s been enhanced with the perfect blend of spices. Then comes the moment when you hit that pocket of melted cheddar and Monterey Jack cheeses that stretch with each bite. Top it all with cool sour cream, zesty salsa, and fresh cilantro, and you’ve got a perfect harmony of flavors and textures.
The beef filling is rich and aromatic, with the onions and garlic adding depth while the taco seasoning brings a perfect balance of spices. The combination of cheeses creates the ideal melt factor – the sharp cheddar provides that classic taste while the Monterey Jack adds creaminess and that irresistible cheese pull.
Benefits of Making Homemade Chimichangas
Making chimichangas at home has several advantages over ordering takeout:
- You control the ingredients, avoiding unnecessary additives or excessive oils
- Baking instead of deep-frying significantly reduces the fat content
- Customizable to suit dietary preferences and spice tolerance
- Much more economical than restaurant versions
- Perfect for meal prep – they reheat beautifully
- A fun cooking activity to involve the whole family
Ingredients for Beef and Cheese Chimichangas
Here’s everything you’ll need to create these mouthwatering chimichangas:
- 1 lb ground beef
- 1/2 cup onion, finely chopped
- 2 cloves garlic, minced
- 1 packet taco seasoning
- 1/2 cup water
- 1 cup shredded cheddar cheese
- 1 cup shredded Monterey Jack cheese
- 6 large flour tortillas
- 1/4 cup melted butter or vegetable oil (for brushing)
- Sour cream, salsa, and chopped cilantro for serving
Tools You’ll Need
This recipe doesn’t require any special equipment, making it accessible for all home cooks:
- Large skillet for cooking the beef filling
- Baking sheet
- Parchment paper
- Pastry brush (for brushing the tortillas)
- Measuring cups and spoons
- Cutting board and knife
Ingredient Substitutions and Additions
Don’t have exactly what the recipe calls for? No worries! Here are some great substitutions:
- Ground turkey or chicken can replace beef for a lighter option
- For a vegetarian version, try using black beans and corn instead of meat
- Mexican blend cheese works if you don’t have separate cheddar and Monterey Jack
- Corn tortillas can be used instead of flour (though they may be more difficult to fold)
- Add diced bell peppers or jalapeños to the filling for extra flavor and texture
- Try adding a can of drained black beans or corn to stretch the filling further
- For extra creaminess, mix in 2 tablespoons of cream cheese to the filling
If you enjoy spicy flavors, check out my Spicy Pineapple Chutney which makes an amazing alternative topping for these chimichangas!
How to Make Beef and Cheese Chimichangas

Step 1: Prepare the Beef Filling
In a large skillet over medium heat, brown the ground beef, breaking it up as it cooks. Add the chopped onion and minced garlic, continuing to cook until the onion becomes translucent and soft, about 3-4 minutes.
Drain any excess grease from the pan, then add the taco seasoning and water. Stir everything together and let it simmer for about 5 minutes until the mixture thickens and the liquid reduces. Remove from heat and let it cool slightly.
Step 2: Assemble the Chimichangas
Place a large flour tortilla on a clean working surface. Spoon 2-3 tablespoons of the beef mixture into the center of the tortilla, spreading it in a line but leaving about 1-2 inches of space on all sides.
Top the beef with a generous sprinkle of both cheddar and Monterey Jack cheeses, using about 2 tablespoons of each per chimichanga.
To fold, first bring the two sides of the tortilla over the filling, then fold the bottom edge up over the filling. Continue rolling upward until the chimichanga is completely sealed. Place seam-side down to prevent it from unfolding.
Step 3: Bake to Crispy Perfection
Preheat your oven to 400°F (200°C) and line a baking sheet with parchment paper.
Arrange the rolled chimichangas seam-side down on the prepared baking sheet, leaving some space between each one. Brush each chimichanga generously with melted butter or a light coating of vegetable oil – this is what gives them that beautiful golden color and crispy texture without deep-frying.
Bake for 20-25 minutes, or until the chimichangas are golden brown and crispy. I recommend checking them at the 15-minute mark and rotating the pan if they’re browning unevenly.
Step 4: Serve and Garnish
Remove the chimichangas from the oven and let them cool for about 5 minutes. This brief resting period allows the filling to set slightly and makes them easier to handle.
Serve warm, topped with a dollop of sour cream, a spoonful of your favorite salsa, and a sprinkle of freshly chopped cilantro. For an extra touch, add some sliced avocado or guacamole on the side.
What to Serve With Beef and Cheese Chimichangas
These chimichangas are incredibly versatile and pair well with many sides:
- Mexican rice or cilantro lime rice
- Refried or black beans
- Fresh green salad with lime vinaigrette
- Corn with cotija cheese
- Guacamole and tortilla chips
- For an interesting fusion option, try serving with Goat Cheese and Cranberry Orzo with Basil Pesto Drizzle
Pro Tips for Perfect Chimichangas
- Warm your tortillas slightly before rolling to make them more pliable and prevent cracking
- Don’t overfill the tortillas or they’ll be difficult to fold and might burst during baking
- Make sure to place the chimichangas seam-side down to prevent them from unraveling
- For extra crispiness, lightly spray or brush the chimichangas with oil halfway through baking
- Let the beef mixture cool slightly before filling the tortillas to prevent the cheese from melting too quickly
- For a time-saving hack, prepare the beef filling a day ahead and refrigerate until ready to use
Storage Instructions
These chimichangas are perfect for meal prep and store beautifully:
Refrigerator: Store cooled chimichangas in an airtight container for up to 3 days.
Freezer: Wrap individual chimichangas in aluminum foil, then place in a freezer bag. They’ll keep for up to 3 months.
Reheating: For refrigerated chimichangas, reheat in a 350°F oven for 10-15 minutes until crispy and heated through. For frozen chimichangas, bake at 350°F for 20-25 minutes or until thoroughly heated. You can also use an air fryer for perfectly crispy results!
Looking for more cheesy comfort food ideas? My Cheesy Chicken and Broccoli Stuffed Shells make another fantastic family meal option!
Frequently Asked Questions
Q: What’s the difference between a chimichanga and a burrito?
A: While both are filled and rolled tortillas, chimichangas are typically deep-fried (or in this healthier version, baked until crispy), while burritos are usually served soft.
Q: Can I make these in an air fryer?
A: Absolutely! Cook them at 375°F for about 8-10 minutes, checking occasionally to prevent over-browning.
Q: How can I make this recipe spicier?
A: Add diced jalapeños or a dash of cayenne pepper to the beef mixture, or serve with a spicy salsa on top.
Wrapping It Up
These Beef and Cheese Chimichangas bring restaurant-quality Tex-Mex flavor right to your dining table with surprisingly little effort. The baked approach gives you that irresistible crunch without the mess and calories of deep-frying, while the seasoned beef and melted cheese filling delivers comfort food satisfaction in every bite.
They’re perfect for busy weeknights, weekend gatherings, or anytime you’re craving something hearty and delicious. The best part? They’re endlessly customizable to suit your family’s preferences!
Don’t forget to explore more delicious recipes on RecipesFoody.com for your next culinary adventure!
If you try this recipe, I’d love to see your creations! Share your photos on Pinterest and let me know how your family enjoyed these mouthwatering chimichangas.
Nutritional Information (per chimichanga):
- Calories: Approximately 350
- Protein: 19g
- Carbohydrates: 28g
- Fat: 18g
- Fiber: 2g
- Sodium: 680mg
Note: Nutritional values are approximate and may vary based on specific ingredients used.

